
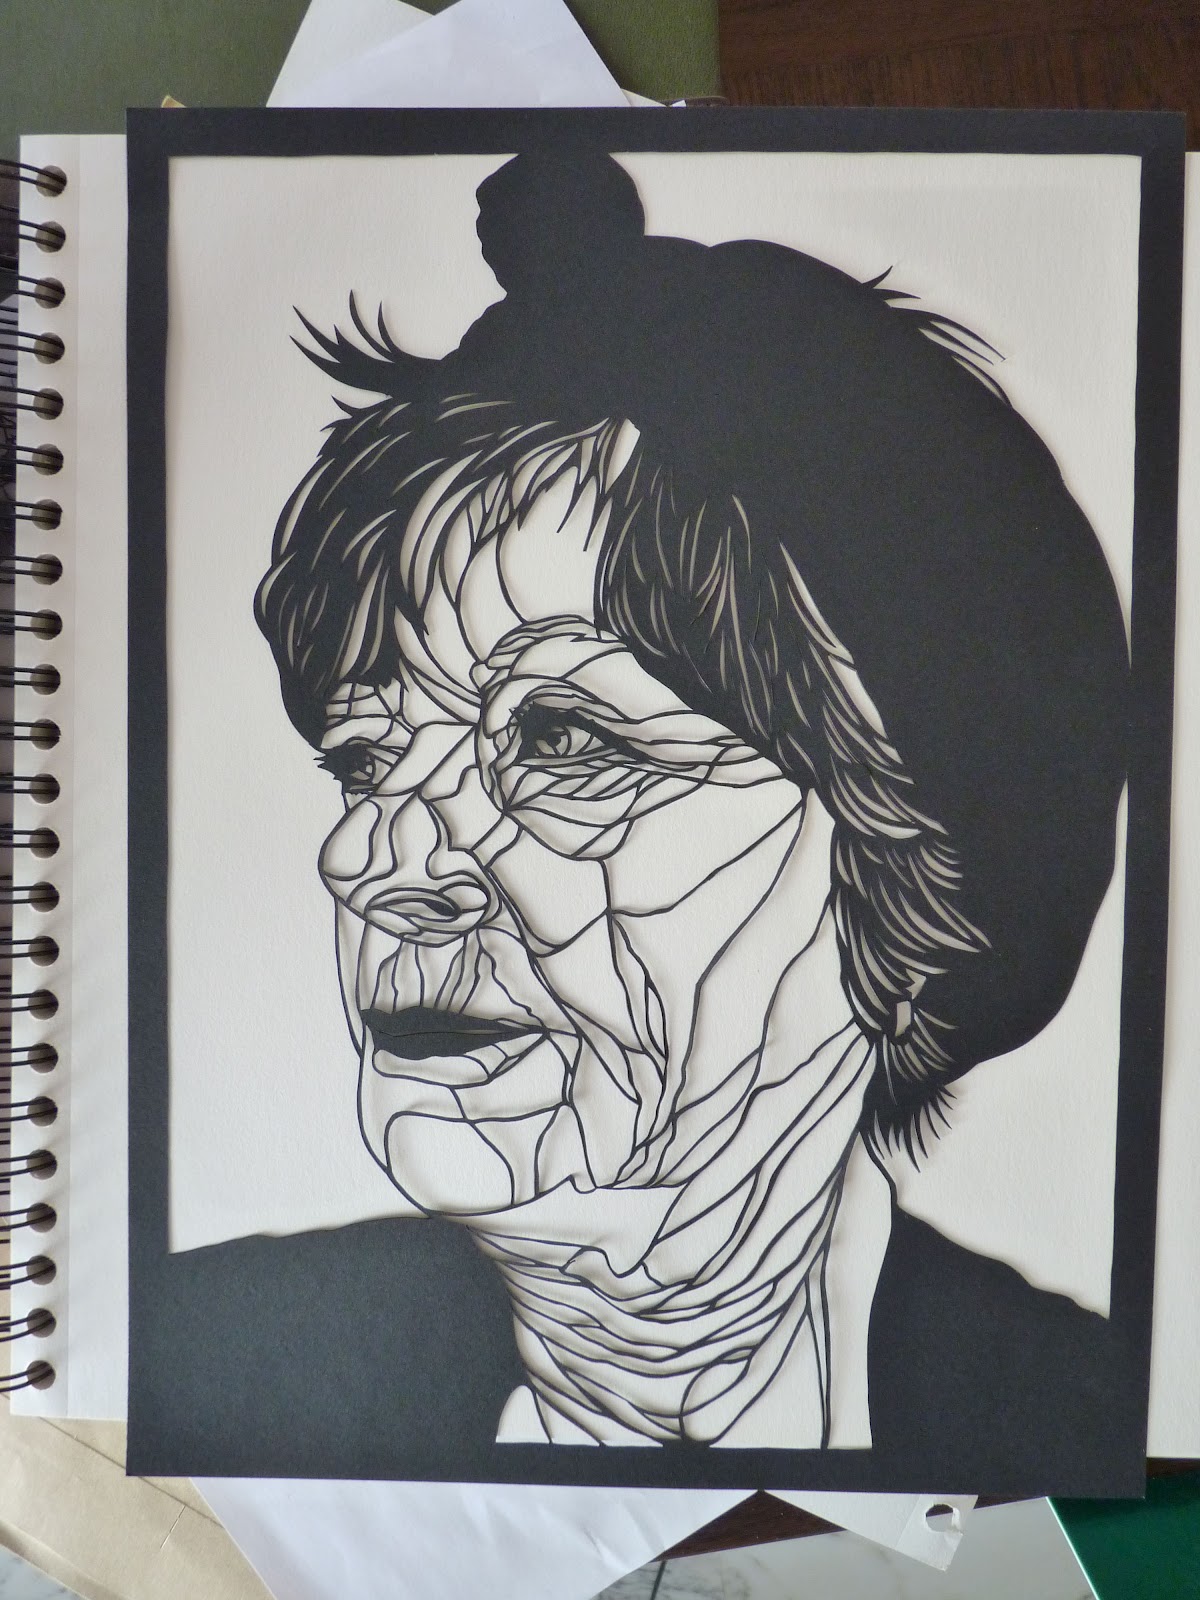
I used Canson black paper, 24x32 cm, 160 g/m2 (about 9.5x12.5 inches. I don't know how to convert the weight of the paper, but it is double in weight than the ordinary printer paper.)
After finishing the cutting it "screamed" for some color. So I painted with acrylic some blue shades on her hair dress. But it was not enough. I felt I needed to add some warmth to it.
Next step then, I painted some white paper with shades of yellows, reds and blue but it looked too flat. I then changed the background color to fit the shape of the portrait in a way that the portrait itself has warmer and sharper shades of yellow.
Hope the photo bellow help you to see better the process.


Thanks for the details! It's so interesting and the result is amazing!
ReplyDeleteThank you Jutta.
ReplyDeleteIt's very interesting to see this process .So you did draw the face first and then cut it. I would very much like to see that, but i can understand if that's too inquisitif and you prefer to keep that for yourself. Thanks a lot for showing this,
ReplyDeleteregards,
Marion
Hi Marion, you can see in the new post (one above this one) more photos of another work that might give you some more info. The thing with cutting is to have "bridges" so that the paper won't fall apart. Take a look at the next post: http://iritlevymosaicart.blogspot.com/2012/04/i-have-finished-my-new-portrait.html
ReplyDeleteAnd if you have more questions I will be more than happy to answer.